salad of arugula, goat cheese, roasted red peppers and toasted pistachios

SONY DSC

This summer, while dining with a friend at a quaint little Italian bistro in Denver, I was able to feast on a most delicious salad.

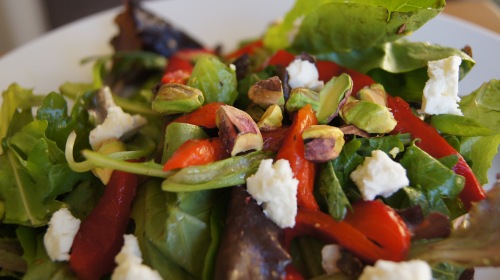
It consisted of arugula, goat cheese, roasted red peppers and toasted pistachios, all dressed in a light balsamic vinaigrette.

It was memorable for sure.

Like the kind of memorable where you take a picture of it just so you can look at it again and again and recall its delight (or perhaps that’s just something I do!).

Last night I attempted to recreate this salad, and I must say, it had me raving all over again.

It’s super easy to create. And for real convenience, you can pick up all of the ingredients you’ll need at Trader Joes.

  1. Bag of arugula
  2. Log of goat cheese
  3. Jar of roasted red peppers
  4. Bag of pistachio pieces
  5. Bottle of balsamic vinaigrette

Of course, if you are wanting to be a bit more creative in the kitchen,  you can roast your own red peppers and make your own homemade balsamic dressing like I did.

Either way you go, its sure to be an incredible side dish. Hope you get to enjoy!


Leave a comment

Filed under Uncategorized

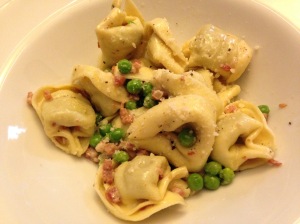
pesto tortellini with pancetta, peas and cream

I love pasta.

IMG_1576

I’ve been wanting to find a new pasta recipe to create for some time now.

So when my sister, who recently returned from a several year stint in Italy, shared this one with me, I just knew I needed to make it for myself.

I mean pasta, bacon and cream, what’s not to love?!  Plus, its super simple and easy to make. I was even able to pick up all of the ingredients I needed at Trader Joe’s in one fell swoop.

The are a few secrets to making this dish truly Italian though, and they are as follows:

  • cook the pancetta nice and crisp (well, this may not be the Italian way, but it’ll make it delicious!)
  • deglaze the saute pan with white wine, so that the tasty bits left on the bottom of the pan will flavor the sauce
  • use grated Pecorino Romano rather than Parmesan, its more flavorful and slightly saltier
  • cook the pasta ‘al dente’, which means you don’t over cook but you under cook, leaving a little bit of crunch
  • transfer the pasta straight from the pot of boiling water to the saute pan using a slotted spoon (no strainers here folks!)

My husband and I were both speechless after our first bite. It’s that good.

I hope you get the chance to create and enjoy this recipe yourself!

Tortellini with Pancetta, Peas and Cream 

2 T yellow onion, finely chopped

2 t garlic, minced**

2 oz pancetta, cubed

1/8 to 1/4 c dry white wine or more if needed

1/4 c to 1/2 c heavy cream

Pecorino romano, grated

1/4 c frozen peas, thawed

1 package of Trader Joe’s fresh pesto tortelinni

salt and pepper

Place water and a hearty dash of salt in a pot, turn heat to medium high so water can prepare to boil.

Meanwhile, place pancetta in saute pan and cook for four minutes on medium heat, add onion and garlic and continue to cook until pancetta is crisp.  Turn heat to low, add white wine and continue to cook and stir for around five minutes, then add heavy cream and a handful of grated cheese and stir, stir, stir (add additional cream and cheese if it looks like more sauce is needed!). Add peas. Season with pepper and a small dash of salt.

Place tortellini in boiling water for 2-3 minutes (you want the pasta to be al dente (with a light crunch, but inside filling heated through).  Use slotted spoon or pasta scoop to remove tortellini from water and place directly in saute pan.

Turn heat off.  Toss pasta and sauce, then sprinkle with grated cheese and serve.

**I should note after preparing the sauce, I wanted a bit more garlic flavor so I added a dash of Lawry’s Garlic Salt to it and that did the trick!

1 Comment

Filed under Uncategorized

corn & cheese chowder

SONY DSC

I first tried this AMAZING corn chowder last December, around Christmastime, when my sister made it for our whole family to enjoy, and enjoy we did!

Recently I was looking to mix up our dinner menu, to create something new for us to enjoy and I was feeling in a fall mood (even though it’s STILL 90 degrees where I live!) and that’s when this soup came to mind.

The recipe for this chowder comes from the beloved Pioneer Woman.  This is the first dish I’ve ever made of hers, and it may have just made me a believer.

I know many, many people just adore her and her recipes and I wish I could say the same for myself.  To be honest, I’ve spent more time being jealous of the life she gets to lead with cooking (I mean how amazing and how incredible!) than being open to her, to receive from her, to celebrate the good things in her life and to hope for some of the same things in my life as it relates to cooking.  I mean, Lord have mercy!

She is a very talented cook. Her recipes seem to be quite simple yet very delicious.  Her website even shows you how to create a recipe step by step, which is good for people who like and need that type of detail.

This is one of her super simple recipes that is sure to delight your tummy and your tastebuds. Immediately after my husband’s first bite, he says, “This is for sure going on the list of my favorites you cook and is something you must cook again!” Duly noted.

I should mention that I cut the original recipe in half, as my husband and I aren’t leftover people. I also made a few tweaks of my own since I didn’t have any pepper jack cheese on hand but I did have a jar of jalapenos in the fridge.

I too hope you get to enjoy!

Corn & Cheese Chowder
(Adapted from The Pioneer Woman)

2 T butter
1/3 an onion, chopped
2 slices bacon, cut into pieces
1 whole red bell pepper, finely diced
2 c frozen corn kernels, defrosted
1/8 c all-purpose flour
1 1/2 c chicken broth
1 c half-and-half
3/4 c Monterey Jack, grated
1 green onion, sliced
1 jarred jalapeno slice, cut into small pieces

In a dutch oven, melt butter over medium-high heat. Cook onions for about 4 minutes. Add a 1/4 of bacon pieces and cook for another 4 minutes or so, then add diced bell peppers and cook for 4 more minutes. Add corn and cook for a minute.

Add flour and immediately stir to combine. Pour in broth and stir. Allow this to thicken for 4 minutes, then reduce heat to low. Add half-and-half, stir, then cover and simmer for 10 minutes so it thickens.

While soup is simmering, cook remaining bacon pieces in a pan on the stove top until crispy. When cooked, remove from pan with tongs and place on a plate lined with paper towel to absorb grease.

Finally, stir in cheese, remaining crisped bacon and green onions. Season with salt and pepper as needed.  When cheese is all melted, it’s time to ladle into bowls.
Leave a comment

Filed under Uncategorized

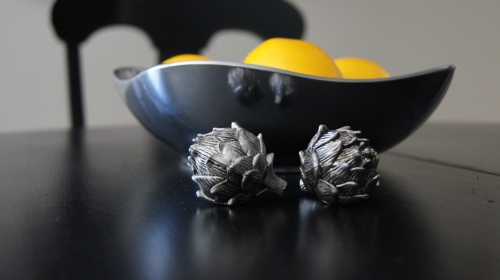
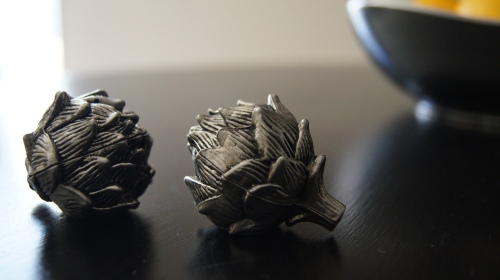
cute little artichokes

There are two things I love about these photos.

SONY DSC

One, the adorably cute little pewter artichoke salt and pepper shakers (they truly are the star of the show). Two, I was was the one who took these photos, incredible, I mean just incredible.

SONY DSC

We’ll start with the set of shakers.

My husband and I purchased these lovely little winsome artichokes while visiting San Francisco on our end-of-the-summer-going-out-with-a-big-bang trip.

I confess we ate our way through the city, indulging in many, many good foods.

We enjoyed tasty Italian fare in North Beach two nights in a row, gobbled up dreamy Ghirardelli hot fudge sundaes and devoured some of the most delectable breakfasts.  

If you get the chance to go, then you MUST try the dungeness crab benedict and orange cranberry walnut french toast from Mamma’s on Washington, as well as a side of Millionare’s bacon and an order of the Big Hip (two slices of deep fried french toast) from Sweet Maple.  You won’t regret any of it, I promise! 

We even rode our bikes across the Golden Gate Bridge all the way to Sausalito and back, simply so we could try a plate of Fish’s fresh Alaskan halibut fish and chips and a bowl of clam chowder with an ice-cold beer. I highly recommend, it’s a great place to enjoy delicious food and beautiful atmosphere. It’s located just a mile past the ferry docks in Sausalito (make sure you bring plenty of cash because it’s the only form of payment they accept).

I digress with talk of food, on to the photos.  

I don’t think I can take all credit for the goodness of these photos, photos that were only even meant to be test shots. I need to give credit where credit is due, so I give it to the Sony A33 A55 digital camera that I used to snap these beauties. 

It’s a new camera for me, one I recently inherited thanks to my father-in-law and one that I’m just thrilled to be able to use.

I can hardly believe that all I had to do was look, point and shoot and these were the result.  I mean these photos were taken with no formal training people! (Perhaps my viewpoint will change slightly after I do receive some formal training, who knows?!)

Gifts, all things truly are — cute little things, travel, food that goes beyond just delicious, the beauty of a photo, a good camera and people’s generosity — and I’m incredibly grateful! 

Leave a comment

Filed under Uncategorized

just do it, a trip to the farmer’s market

photo 2 (4)

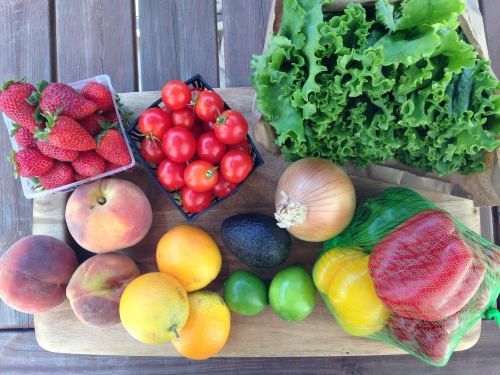
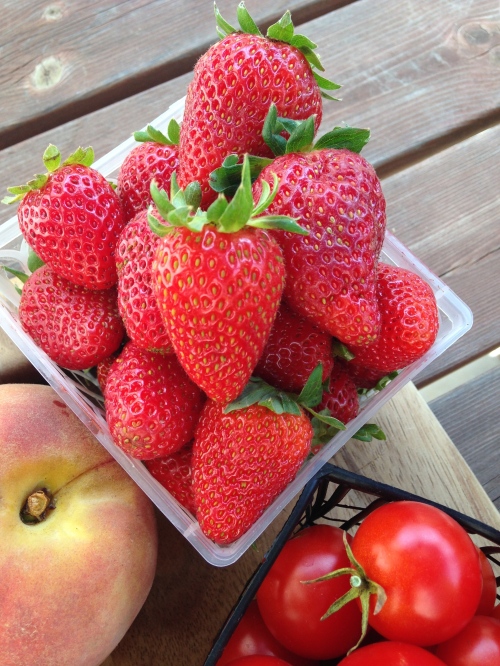
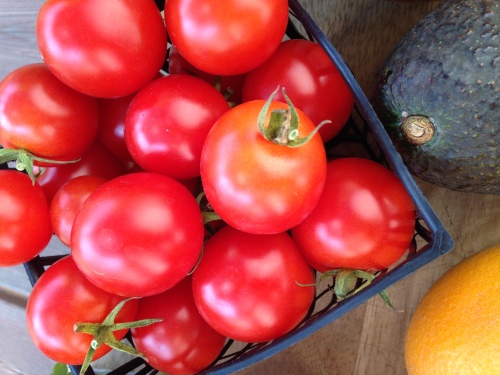
Saturday morning I made a trip to my local farmer’s market and came home with some amazing fruits and veggies.

I must say, I’m super proud of myself.

I think it’s been on my bucket list of things to do for the past three years (I guess there’s room to take the pride down just a bit then).

What’s amazing to me is how we (and by we, I mean I) have these things that we really want to do, yet we (again, I) can come up with so many excuses that keep us from doing them, even something as simple as a trip to the farmer’s market.

It’s too expensive, too far away (7 miles, a 10 minute drive, can feel like an eternity  sometimes), I’ll have to leave my house too early on a Saturday morning to make the market (ahem, 10am too early?), I’ll be overwhelmed by all of the choices, then I won’t know what to pick and I won’t end up getting anything or I’ll get something I hate.

Those were really some of the excuses that held me back.

What was even more amazing though, was how good I felt after I’d gone and done this thing I’d really wanted to do. I pushed past all excuses, went for it and was totally blessed.  I felt great about it all day!

It was super fun walking the aisles (ok, they had one aisle, a very small market) and having some cash on hand to spend. On the way home, I dreamt of all the things I’d create with my purchases!

On Monday I made a delicious ‘welcome home’ meal for my hubby which included: teriyaki marinated beef shish-k-bobs with skewered onions, bell peppers and tomatoes served alongside fluffy white rice and vanilla ice cream with fresh strawberrries and peaches for dessert.

photo 1 (7)

I used the rest of the strawberries to whip up another batch of my grandma Cynie’s homemade strawberry rhubarb jam.   And the remaining peaches, adorned thick slices of french toast that were dusted with powdered sugar, drizzled with maple syrup and served with a side of crisp bacon.

photo 3 (5)

The last bit of cherry tomatoes will be used to create a most excellent pico de gallo that will accompany large plates of grilled chicken and black bean nachos for my husband and I to enjoy.

Even as I write, my mouth waters.

What a gift food is, and what a gift it is to have fresh, good food so easily accessible.  I hope I never, ever take this for granted, seriously.

Thank you for all of your good gifts Lord!

Leave a comment

Filed under Uncategorized

shrimp cocktail

Shrimp cocktail is a delightful appetizer.

It’s refreshing, hearty yet light and delicious.

Cup Shrimp

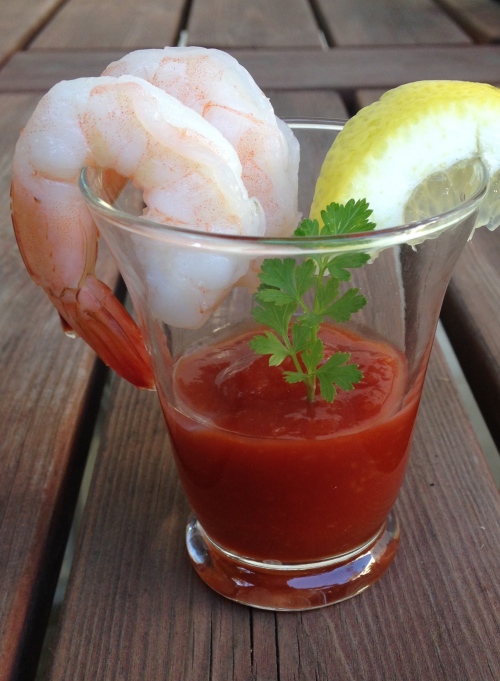
And aren’t these little guys just adorable?  Though they look like GIANTS given the size of this picture, ha ha!

I can’t take all the credit for them though. I did create them, yes, but the idea for them didn’t totally come from me.

My inspiration came from 24 Carrots, a local catering company that I used to work for. I worked as a server, catering high-end parties and over-the-top weddings.

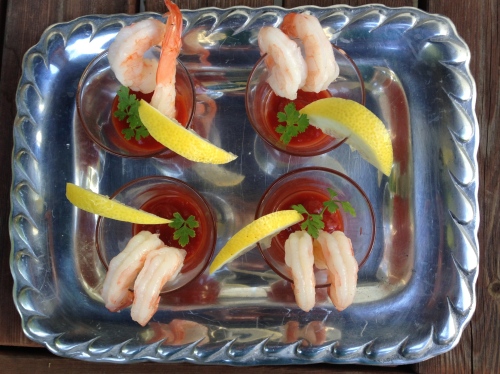
One of the most requested, and enjoyed, appetizers we offered was the shrimp cocktail.  Not only were the shrimp incredibly tasty, but they were served in a very impressive way.

Each jumbo shrimp was hung on the side of a tiny champagne glass that had been filled with spicy cocktail sauce and garnished with endive and fresh chives.

We’d fill a tray full, deliver them to guests and then listen to them rant and rave.

Tray of Shrimps 2

I served my own version of this shrimp cocktail as a surprise appetizer at a very special birthday celebration that I hosted a few weeks ago.

The guest of honor was just tickled, feeling especially blessed by the thoughtfulness, amazing presentation and taste of this dish.

It was the perfect amount, leaving us with plenty of room to thoroughly enjoy what followed: marinated, grilled flank steak with sauteed mushrooms, goat cheese biscuits, mixed greens with balsamic vinaigrette and angel food cake with fresh strawberries and whip cream.

I do hope you grab a few small glasses of your own and enjoy a shrimp cocktail for yourself!

Shrimp Cocktail

8 jumbo shrimp, fully cooked with tail on
1 bottle of cocktail sauce
1 lemon, sliced
1 small bunch of parsley (or any fresh herb), rinsed and cut into small sprigs
4 small glasses

Place a small amount of cocktail sauce in the bottom of each glass, being careful not to pour it down the sides of the glass.  Hang two shrimps on the rim of each glass.  Cut a small slit in each slice of lemon.  Place one slice of lemon on the rim of each glass. Garnish by placing a small sprig of parsley into the cocktail sauce in the center of each glass.


Leave a comment

Filed under Appetizers

beauty for the table


image

The other day I was desiring to be surrounded by a bit of beauty, and what better place to display such beauty, than on our dining room table.

It was late afternoon when this desire arose within me. I wasn’t wanting to leave  home to make a trip out to the store, nor was I really wanting to spend any money to purchase something beautiful.

So I decided to take a look around the house and see if there was anything I could use to create what I desired.

In our kitchen cupboard, I found a tall, slender mason jar. I also found a spool of twine in a drawer. Then I spied some beautiful blooms on the bougainvillea that sits on our patio, they were a shocking pink.

I tied some twine around the mason jar, filled it with water and arranged a few cuttings of the bright pink flowers.

I was excited because it was looking good, though I knew that it still needed something more, so I returned to our back patio.

image

I clipped two small branches from our dwarf lemon tree that were filled with green leaves and one small bunch of fresh sage leaves.  I figured these things would add a little pop of color to the mix.

image

I placed the arrangement on a wood round that I already had at home and added a cute set of little white bird salt and pepper shakers (I should mention that the wood round cost $10 from Michael’s and the shakers cost $1 from the Dollar Tree. Who says beauty has to cost big bucks?).

Every time I’d walk by our dining table, and every time I’d glance over at this centerpiece, I’d think, “ahhh God, thank you for beauty!”  My soul was being blessed.

The next time you’re sensing desire within, I encourage you to take a look around, to see what you already have and to create some beauty of your own. I just know you’ll be blessed.

Leave a comment

Filed under Uncategorized

deviled eggs on a pretty plate

image

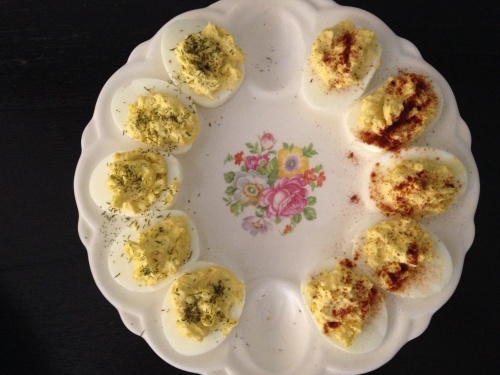
Recently, I inherited a beautifully designed plate that was crafted to display and serve deviled eggs.

I’ve never owned something like this, an heirloom if you will, so of course I couldn’t wait to use it.

Easter was the perfect opportunity, as we hosted an Easter lunch at our place and deviled eggs are part of the more traditional Easter fare.

I decided to mix things up, and made two different kinds of deviled eggs. Half of the eggs were sprinkled with paprika and half with dill.

We each tried both eggs and couldn’t declare a winner, because honestly, both were super delicious.

I served them alongside a spiral cut ham from Honeybaked Ham, cornflake potato casserole, roasted asparagus and fresh rolls.

I do hope you too get to enjoy!

Deviled Eggs**

Eggs
Mayo
Yellow Mustard
Salt
Pepper
Paprika
Dill

Fill a saucepan with water, add eggs and boil on high heat for 11 minutes. Remove eggs from boiling water, place in a bowl and let cool in the fridge.

When cool, take out of the fridge and remove the shells from each egg, discard shells.

Cut each egg in half and scoop yolks into a bowl.  Place remaining part of the egg, the egg whites, on a platter.

Using a fork, mix yolks with desired amount of mayo and mustard (I usually use a 3 to 1 ratio, mayo to mustard). Season with salt and pepper.

Using a spoon, scoop a small amount of yolk mixture into the cavity of each egg white.  Sprinkle with either paprika or dill.

**I’ve not given any measurements because I don’t have any.  You are to use as many eggs as you desire. As for the yolk mixture, I’ll keep adding more mayo if it seems too dry or a bit more mustard if it doesn’t have enough flavor.

Leave a comment

Filed under Uncategorized

fork oven-roasted potatoes

image

They will melt in your mouth.

They’re simply delicious, and of course, super easy to make!

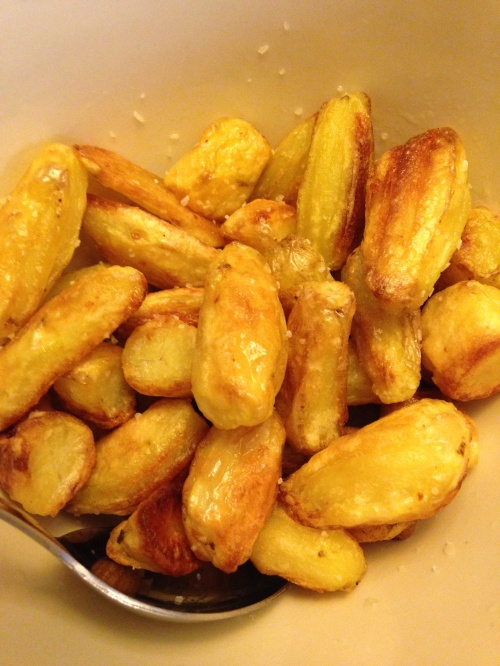
I came across the recipe for these fork oven-roasted potatoes in an issue of Bon Appetit magazine. I couldn’t resist.  I mean potatoes, olive oil, salt and oven-roasted, what’s not to love?

And they live up to their name for sure.

Roasting these potatoes, while coated in olive oil, at a high temperature gives them them a beautiful, golden brown crispy crust on the outside and a flavorful, just melt in your mouth, burst of potato on the inside.

I must warn you that once you taste one of these teeny little guys, you may not be able to stop.  In fact, you might just end up eating the whole sack of potatoes in just one sitting!

I made them this week as a side dish, along with grilled, marinated carne asada and a simple green salad with balsamic vinaigrette.

I do hope you get to enjoy!

Fork Oven-Roasted Potatoes

Recipe adapted from Bon Appetit

1 bag of Trader Joe’s Teeny Tiny Potatoes
1/4-1/2 T kosher salt
1/4 c olive oil

Preheat oven to 400.

Peel potatoes. Place potatoes in a salted pot of boiling water for 3 minutes. Remove potatoes and place on a paper towel lined plate.  When cool enough to hold, run a fork down the sides of each potato, scraping slightly, so as to create a groove on the surface.

Pour oil onto a rimmed baking sheet and place in the oven for 4 minutes.* Add potatoes, turing to coat and season with salt.  Cook for 30-40 minutes, turning potatoes two more times, or until skin is a nice golden brown and looks crispy.

* I should warn you that your house may take on a smell from the olive oil being heated in the oven at such a high temperature, so I always turn on my oven vent fan and open the windows to let some fresh air in!


Leave a comment

Filed under Uncategorized

orange cranberry scones

DSCF3193

I love that the month of January provides us with oranges! A good orange is my most favorite type of citrus.

I remember falling in love with oranges while studying abroad in Granada, Spain my junior year of college. I arrived there the month of January, and oranges were all we ate. They came straight from the tree and were just delicious. Every cafe and bar in the city would have a big bowl of oranges sitting next to its juicer. You could order and enjoy a glass of fresh squeezed orange juice anytime you liked.

There’s also nothing like an orange from a tree in Southern California. They too are just delicious — juicy and sweet, with a little bit of tart. So I was super ecstatic when my husband returned home last week with a plastic bag full of oranges that he’d just picked from a co-worker’s tree, thank you!!

We’ve been partaking in, as well as rationing them, all week. This morning I made a batch of orange cranberry scones for a breakfast treat.

DSCF3197

In case you’ve not tried it, you NEED to try this scone recipe. It’s killer, I mean seriously amazing!  When I make these scones, they’re always a hit. They’re oh, so flavorful and they just melt in your mouth (unlike a traditional scone that’s usually pretty dry!).

The recipe on this blog is for a lemon poppy seed scone, but it’s super easy to change it up. Simply follow the recipe, but when it calls for lemon zest or juice then use orange instead, and when it calls for poppy seeds, omit them and use a 1/8 c chopped craisins instead.

Hope you enjoy!

Leave a comment

Filed under Uncategorized